
Making Stained Glass Art for the first time | (You've gotta try it!)
- Making To Make Happy
- Oct 12, 2024
- 6 min read
Glass art is something I've always seen and thought "oh, that's cool!", but I've never quite known how to even start. It's one of those crafts that feels expensive to take up, and until now I'd not found any class that was easy for me to get to. So, finding a one-day stained glass workshop recently was so lucky!
I had a go at cutting, grinding and soldering pieces of glass to make a stained glass art in a monstera leaf design. It was honestly really interesting and absorbing to do - and I very much went into my calm-focus zone where everything else in the world disappeared for a while.
Making Stained Glass Art - Let's go!
We settled in with our lovely teacher, and after a good ol' health and safety briefing, we picked our design templates. So let's dive into the stages of the process we worked through:

Cutting the Glass
For me, cutting glass came down to two things – scoring and snapping.
So first, the Scoring:
We were given a tool that was essentially a handle with a tiny wheel on the end. After dipping the wheel into an oil-soaked sponge (which needed to be done before each scoring) we positioned the wheel on the edge of the glass, pressed down firmly and pushed forward. (You could also do this with a pulling back motion if that suited better, but for me, pushing forward was easiest.)
First, we had a practice pushing forward in straight lines, and later we practised slight curves. The oil leaves a faint line on the glass so you can see where you have scored.
Then, we Snapped:
We were given a different tool, which was a pair of plastic black handles that came together at their end with a triangle jaw. On the upper side of the jaw there was a tiny arrow in the centre – this is what we would line up with our scoring mark on the glass. Once lined up correctly, we squeezed the handles and the glass would break along the score line. This is super simple on a straight line – it gets a bit more intricate when you are trying to cut a curve. (If a scored line is a deeper curve, it can be necessary to start a snap at one end of the score line, then move the snapping tool to the other end of the line and start a break there too. Then the two snaps meet in the middle of the curve.)
Lastly, Nibbling:

As an extra, for cutting smaller chunks away, we were given Nibblers – which look like pliers. (There is a curved inner edge on one side of the jaw, and this is always positioned at the bottom as you hold them. The glass is placed between the jaws, with the jaw edges on the score line, and the nibblers pushed upwards to snap.)
As we began to cut pieces of glass into the shapes to match our templates, the nibblers allowed us to cut away smaller, harder to snap pieces.
It turns out cutting glass is pretty straightforward once you know how, and hearing the snap as it breaks is very pleasing.
I guess it's the epitome of embracing destruction in order to create something new.
Grinding the Glass
Once we had our pieces cut to roughly the right size and shape on our templates, we moved over to the glass grinder machines.

These are small machines with a grid-surface, which water can fall through. Behind the grinder wheel there is a wet sponge – and if you start seeing white powder residue building on the wheel, it’s a hint to re-wet the sponge liberally.
We were given eye protectors – because it’s splashy and you don’t want pieces of wet glass dust flying into your eyes. Then we held a piece of glass flat on the surface, with an edge pushed against the wheel, pushing it along so the wheel carried on grinding along all the edges. This smoothed out any sharp bits and allowed us to make small adjustments to the shape, to get it into a better fit on our templates.
I love new tools, and so having a go on the watery grinding machine made me very happy. I was picking bits of grit off my forehead all through lunch break though.
Cleaning the Glass
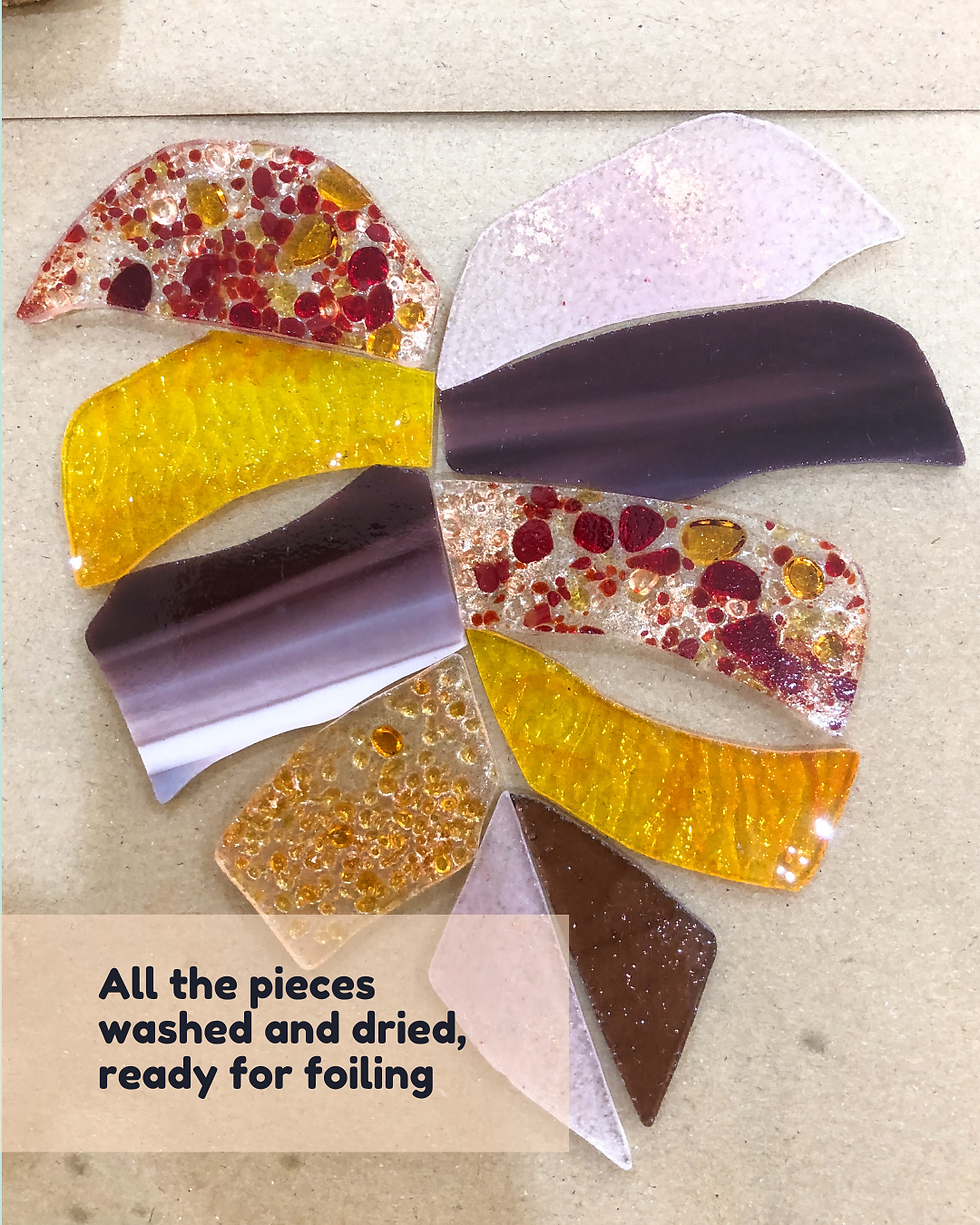
This is important. After grinding the glass, we were told to go and give the glass pieces a really good wash in soapy water. This was to remove all of the oil, dust and grime that had built up through the cutting and grinding stages. If the edges of the glass were not scrubbed clean, then it would mess us up in the next copper foil stage.
So off to the washing up bowl I went – I scrubbed them clean with a sponge and dried them with a tea towel. Shiny.
Adding the Copper Foil

This is a fiddly bit, so if you ever do it, just take your time. We were given a roll of tape, which was sticky on one side and copper foiled on the other. The tape needed to be stuck along the edges of the glass pieces. This meant lining up a glass edge directly in the centre of the tape, so that the tape edges could then be folded down as evenly as possible on either side of the glass. It was recommended that the start and end of the tape should meet on an edge of the glass that would be on an inside a join on the design (for neatness and strength).
Once the edges of the tape were folded down, we were given a cork to press down on those edges with – it was important to get them as flat and securely stuck onto the glass as possible.
Soldering the Pieces Together
The soldering stage was where I really fell into quiet focus, and it became a rather meditative process. It's hot metal so you have to keep all of your attention on your hands, but it's in those moments of concentration that you can actually find yourself feeling relaxed. Who knew smoothing liquid metal could be so satisfying?
We were given a soldering iron, a piece of lead solder, gloves, an extractor fan, a brush and a small jar of green liquid called Flux.

We worked on a surface of brown paper, and assembled our pieces into their arrangement as tightly and neatly as possible. Then we brushed a blob of flux over each of the main connecting areas – any place that would be structural in holding the pieces together. We then blobbed a bit of solder onto each of those connecting areas. This is a bit like when you tack a fabric garment together before sewing it properly – it’s temporary glue, so that when you start soldering properly, your pieces don’t go wandering off. The solder sticks to the copper foil, but not really to the glass – so if you blob a bit onto the glass by accident you can generally remove it once it’s cooled a couple of seconds later.
Solder hardens pretty instantaneously – as soon as you remove the iron, it solidifies. But the magic is that, as soon as you use the iron on it again, it changes back to liquid, so even if it looks messy at first, you can always go back and smooth it out.
Now it was time to solder the main joint/seams as neatly as possible, with a technique called “beading”. We would brush some flux over the seam and then place lots of blobs of solder down in a line. Then we'd smoothe them into each other to create one long clean line. We did this on each of the seams where one glass piece connected to another. When it had hardened on one side, we turned the piece over and did the same on the back.
Lastly, it was time for “tinning”, which is how we soldered the rest of the outer edges of each piece. No extra solder is used for this – we just heated a line from the main seams and pulled out a bit of solder from there (you don’t need much) across all of the other edges.
Final Clean
Once happy with the soldering, and it has fully hardened, it was time to clean it up one last time. Back I went to the sink, and got a soapy (but not super wet) sponge. I scrubbed carefully but firmly over the surface, and then used a tea towel to buff away the soap and bring the glass and metal to a shine. Ta-daaah!

If you have ever fancied having a go at creating stained glass, and you have the opportunity to book a workshop, I recommend it. Making stained glass art is a wonderful craft and I can see how much scope it allows for creativity. I definitely want to try it again in future! Similarly, if there is any creative thing you've been hankering to try, I hope you'll get the chance to give it a go soon - if the opportunity presents itself, take it!
Learning new things and staying curious about the world is what fuels our creativity, so let yourself play!
Thanks for reading,
Keep Making Happy,
Gemma 💛
コメント